
The following are my instructions for pleating a skirt when the pleats are in the same direction the whole way around the dress. If you are good enough to make box pleats or have the pleats change directions you probably don’t need this.
I know that most patterns have instructions for pleating but I’ve never actally been able to follow them. Somehow I just get lost in all of that tedious dot marking. I know that in the day dresses did not have a waist band around the entire waist, only on the part that showed. However, I like to wash my dresses and I have a very nice electric washing machine that makes the whole job very simple. Plus, my dresses seem to last longer if the raw edges are not showing and able to fray. It’s a compromise I’m willing to make.
Make the bodice first. Lay it out and use it as a guide for cutting the waist band. Add about 2-3 inches to the length of the waist seam and cut the waist band to that size. For example; if the bodice is 30″ from one side to the other, cut the waist band at 32 – 33 inches. This allows for about 1″ of seam allowance and 1-2 inches of extra waist band overlap.
Keep in mind that this measurement includes the overlap occurring in the bodice when it’s fastened. If the dress buttons and there is already an inch of overlap in the bodice, you may only want to add one more to the skirt waist. If the dress uses hooks and eyes and the overlap is very small you may want to add more.
Once the waist band is cut, fold it in half and mark the center point with a pin. Then fold it almost in half again – leave the seam allowance as extra on the ends – and mark those folds with pins. When you open it all back up you have pins marking every quarter of the waist band – with a bit extra on the edges for the seams. If you used 44″ fabric panels to make your skirt the seams mark your quarters. If you used something else you will need to mark your skirt in the same way.
Test your fabric and make sure that your pins will not leave long lasting holes in it. If it’s safe to pin, place the pins well away from where you will be sewing so that you can sew the whole piece and then remove the pins. DO NOT sew over pins! Bad, bad, bad! If the pins will leave nasty holes in your nice fabric make sure you place them high enough that the holes will be covered over later. You will have to remove the pins as you go.
Before you start anything, make sure your pleats will be going in the right direction. This will depend on the bodice – if it overlaps right over left of left over right. Your skirt waist band needs to overlap in the same direction.
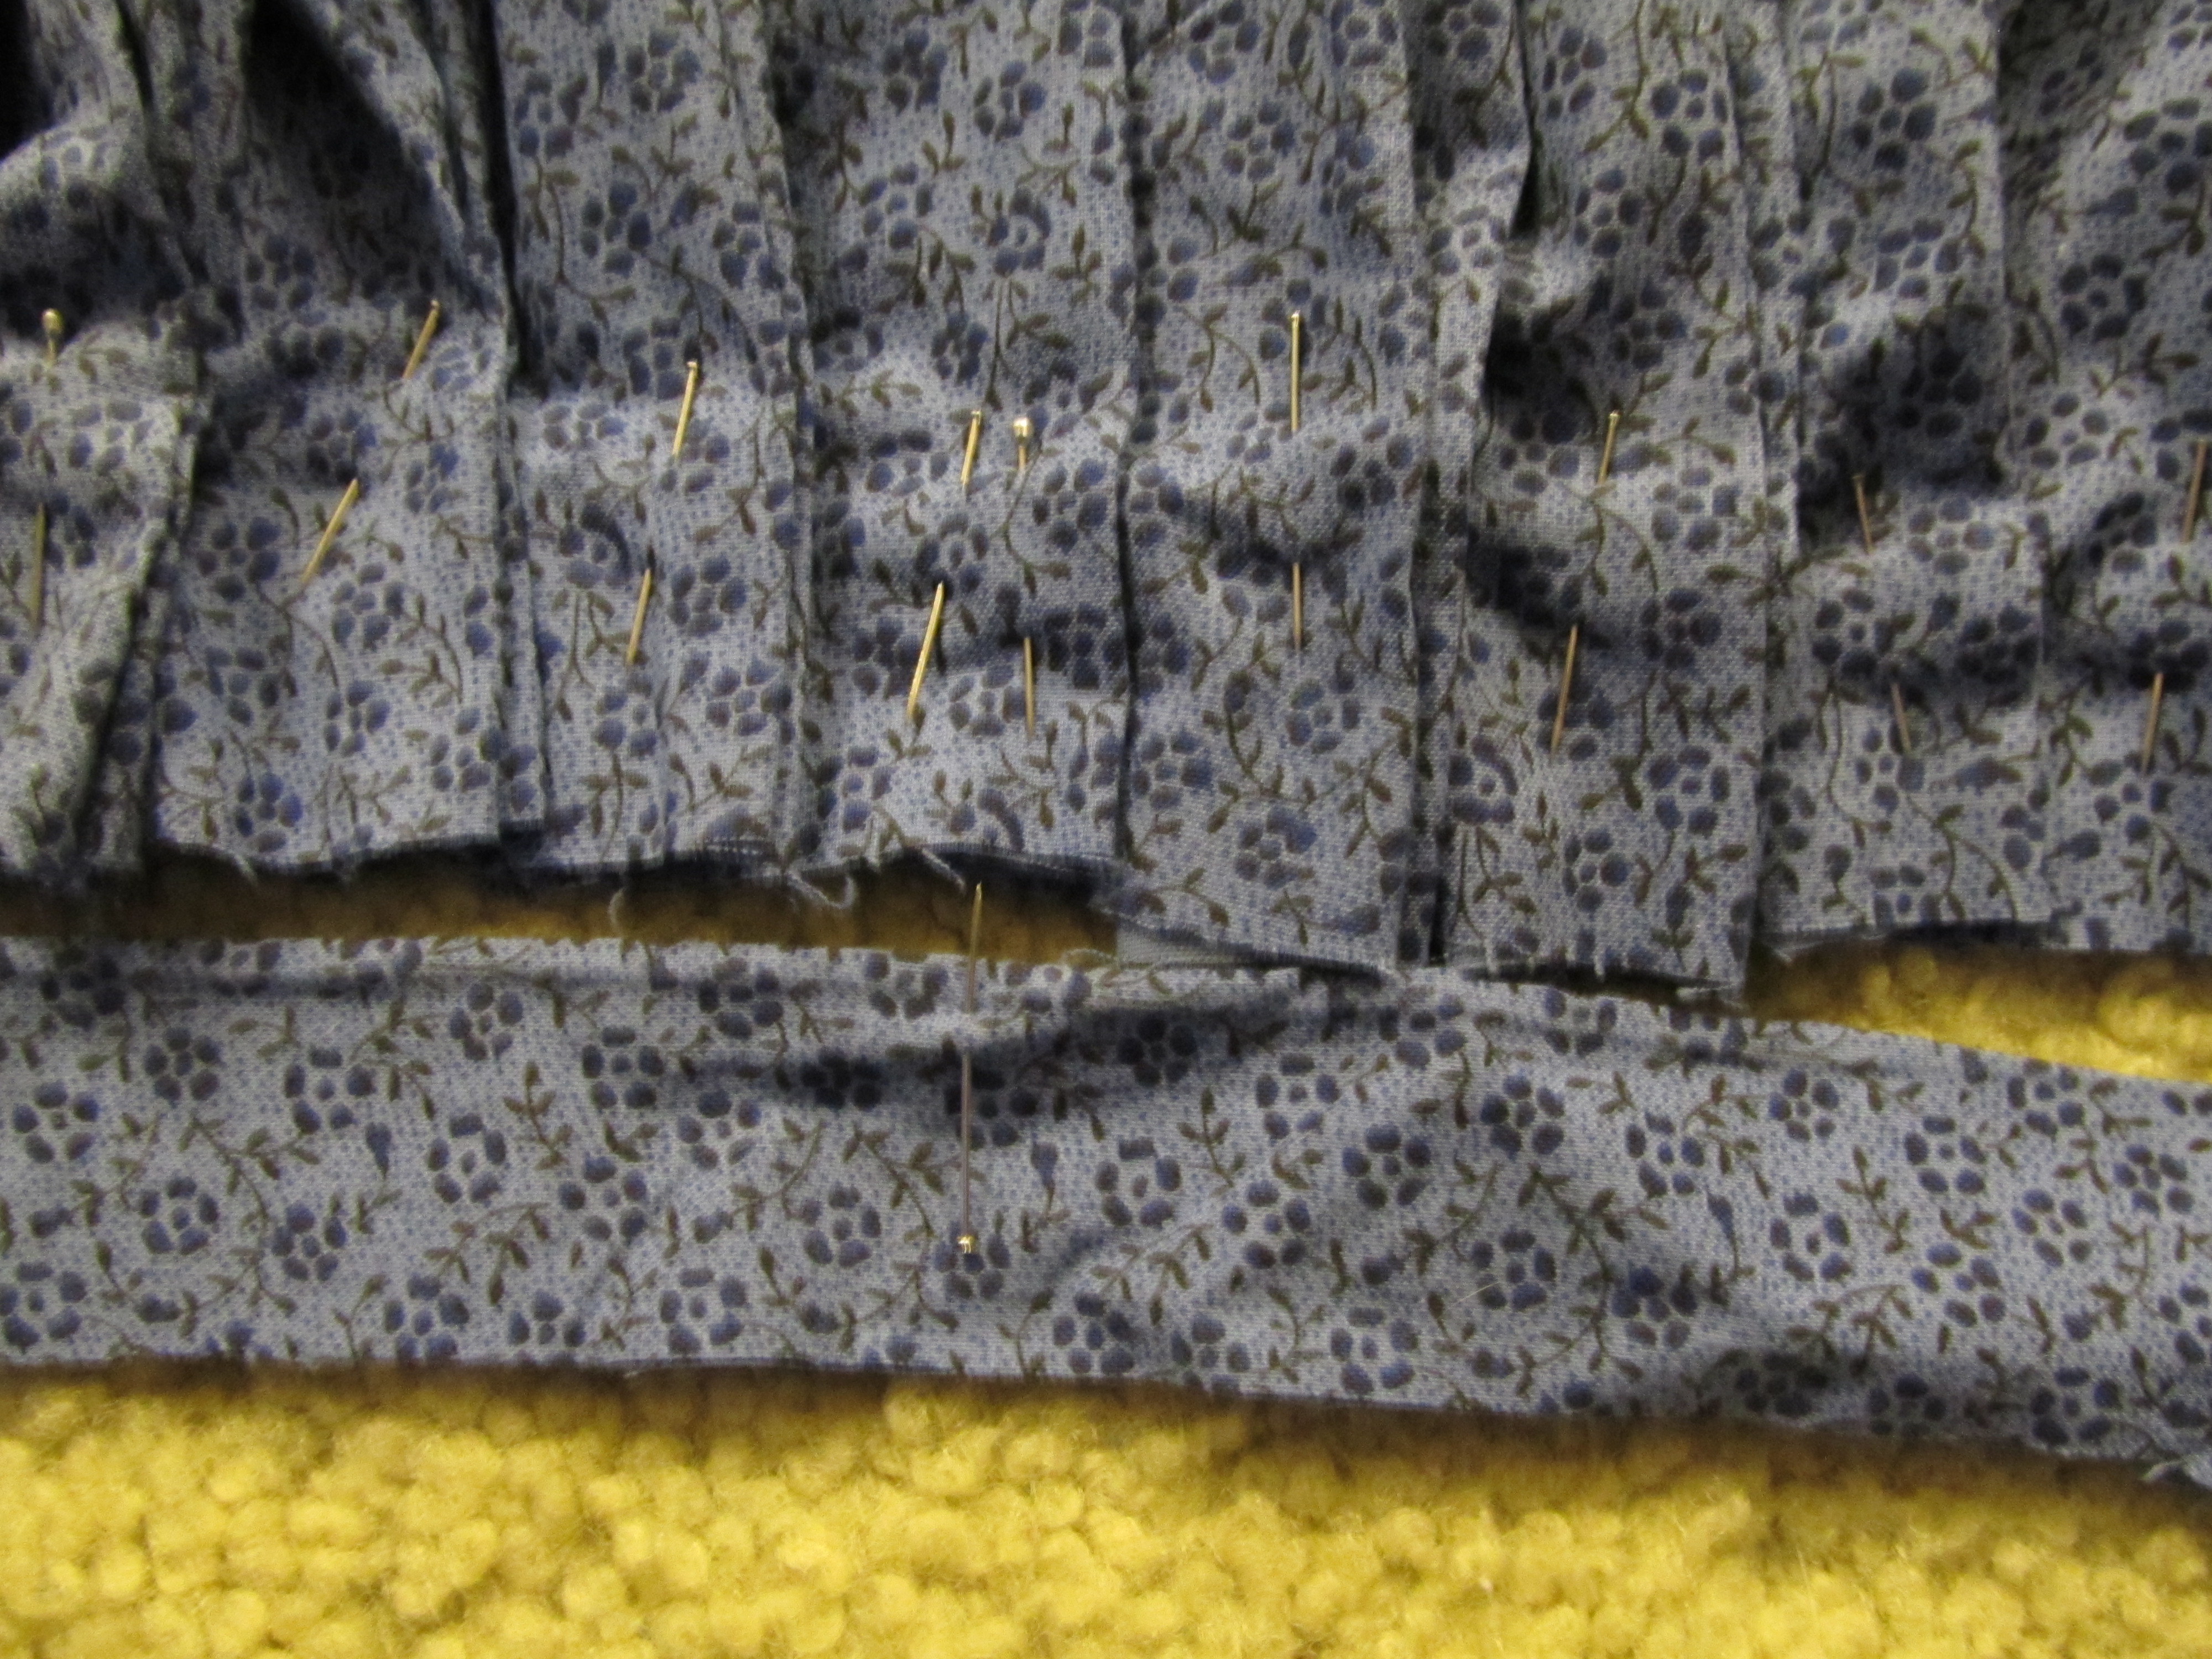 Lay everything out and start pleating using pins to hold the pleats in place as you go. I like to work on the floor because it’s nice and big. I “knife edge” pleated the skirt in the photos but you can use whatever method you wish. The important part is that you pleat only 1/4 of the skirt at a time and that you get your waist band pins lined up with the skirt seams. Don’t forget to let the edges of your waist band hang out to allow for your future seam allowance (see photo). If you get to the seam in the skirt and you are not at the waist band pin you can either adjust the pleats to make them fit or pull them out and start over. If you have to start over, look at the bright side. It’s only 1/4 of the skirt and not the whole thing! I like to mark the quarters (where seams meet pins) by double pinning the pleat. (see photos) This makes it easy to line up when sewing. When you get the first quarter properly pleated then move to the next quarter and so on until it’s finished.
I recommend sewing it according to the instructions in the “cuff, collar, waistband” line located in the table of contents above. Your pleats will try to stretch or shrink as you sew them to the waist band. Make sure that your marks every quarter line up. (See photo) You can use the natural elasticity of the pleats to your advantage here and make sure that they do!
Happy sewing!